Assembling Frames on Rimless Glasses
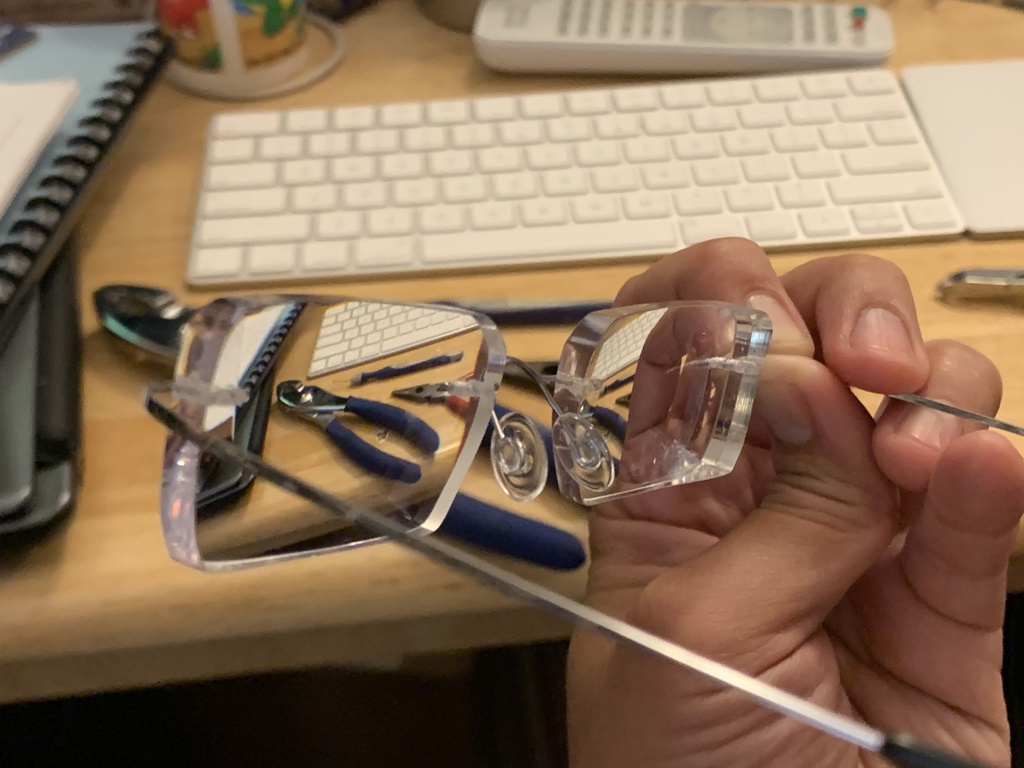
I've long been a fan of rimless, hingeless glasses frames because they are light and don't press against the sides of my head. But they are hard to come by in glasses stores, including online ones, and they are often expensive.
So I've used a little trick: I purchase the lenses and frames separately, and then assemble them myself. This turns out also to be useful if the frame breaks before the lenses do, because then I can just purchase another frame and reassemble the glasses.
It's actually pretty easy to assemble these glasses because rimless glasses tend to follow a set standard: two sets of two small holes on either side of the lens, which connect the frame and the bridge. This picture shows the positions of those holes (circled in red):
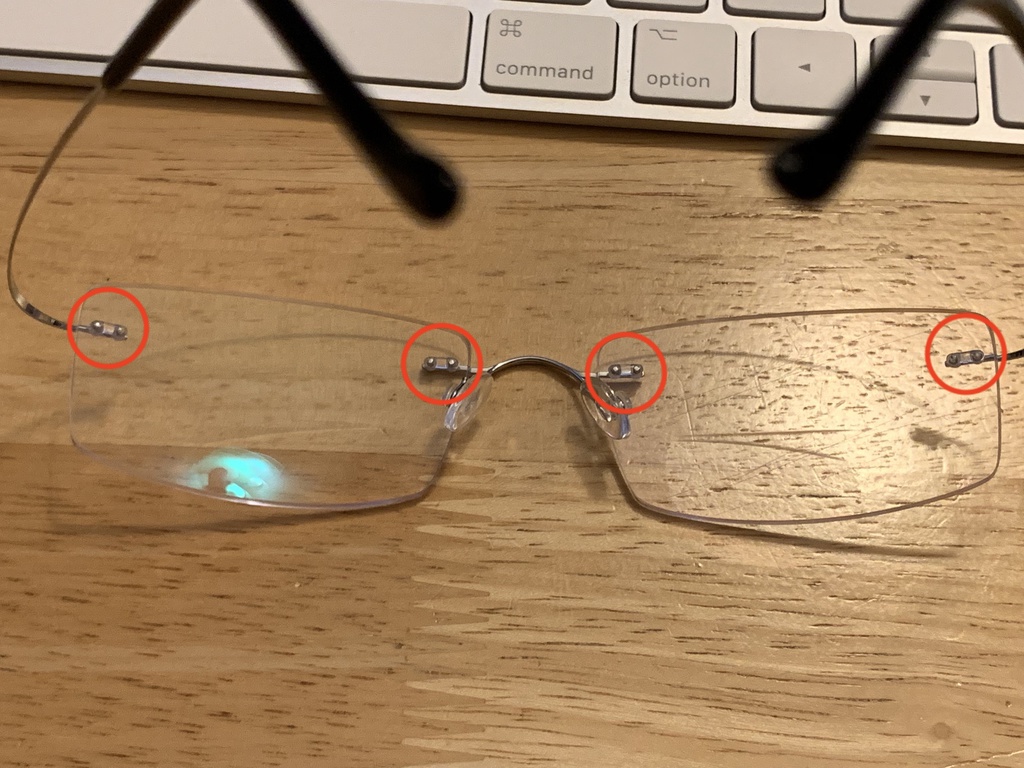
The goal will be to obtain lenses with those same holes and frames compatible with them, and then to put them together.
What to Buy
Three components are needed: the lenses, the frames, and small plastic pieces called “grommets” that hold everything together.
For the glasses, any rimless pair that uses the same hole pattern as above will work, such as this pair. The lenses may be of any shape, and theoretically the store can cut the lenses to whatever shape you want.
For the frames, it is fairly easy to find rimless, hingeless ones on eBay. I’ve also found that Amazon sells them fairly cheaply as bifocals or sunglasses. The bridge width needs to be the same between the glasses and the frames (or the pupil distance must be adjusted accordingly in the lens prescription), though practically all of them seem to use an 18mm bridge width. Materials for frames are generally steel, pure titanium, memory titanium, or beta-titanium; the latter two are alloys. Steel frames are significantly heavier. Pure titanium seems to get better reviews overall and costs slightly more. I’m not sure what the other relevant quality differences are.
The grommets are small plastic pieces that fit into the holes in the lenses and hold the prongs in the frames by compression. They are shaped like the Greek letter ∏, and are composed of two tubes attached perpendicular to a base. They are sold by optical equipment stores, and they may also be included with the frames when purchased. The key specifications for the grommets appear to be:
- Tube portions: internal diameter 0.8mm, external diameter 1.4mm, length 7.0mm (though the length is largely irrelevant since they are trimmed to size)
- Base portion: 5.3mm long by 1.5mm wide by 0.7mm thick
- 1.6mm gap between the tubes
Tools Needed
The only tools that are absolutely necessary are a cuticle clipper, a pair of pliers, and a glasses cleaning cloth. Special tools are available and are designed with plastic parts to avoid scratching the lenses. However, as I explain below, the risk of a problematic scratch from assembling the glasses is actually very low, so I’ve found no need for special tools.
Disassembly
If you purchase assembled glasses, you will have to disassemble them to extract the lenses before you can attach your desired frame. The purchased frame may also come assembled, so you will have to disassemble that too.
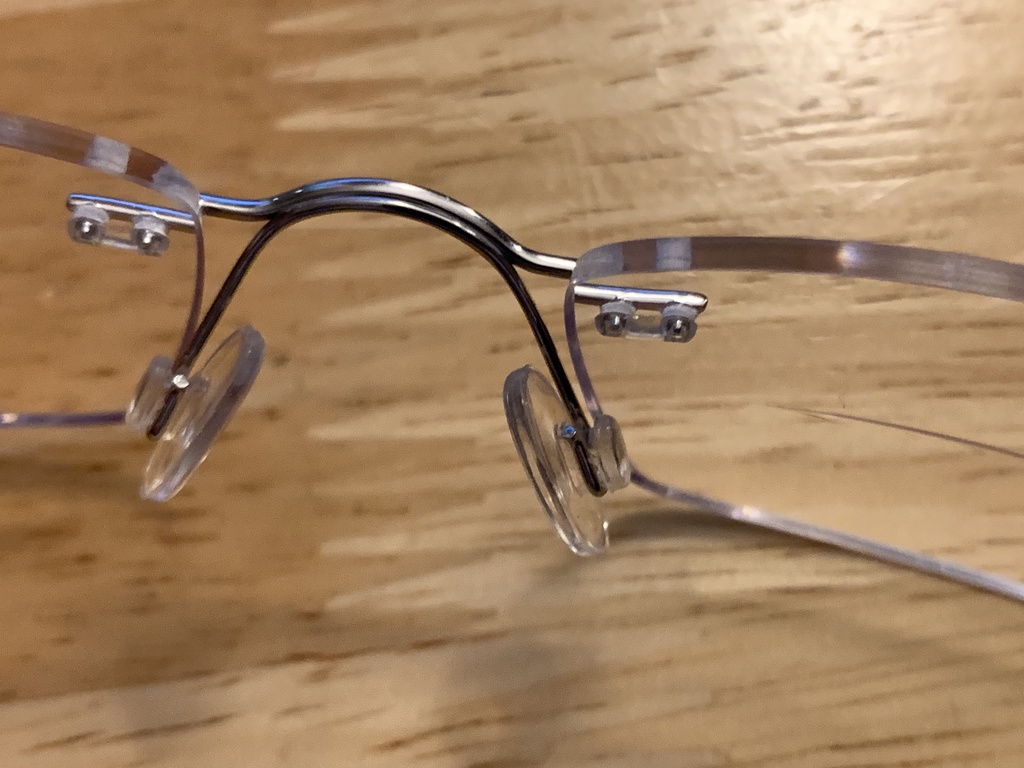
Disassembly begins with cutting off the grommet bases, which are the plastic parts that protrude from the inside face of the lenses:
To cut them off, grasp them as close to the lens as possible with the cuticle clippers and just cut them off:
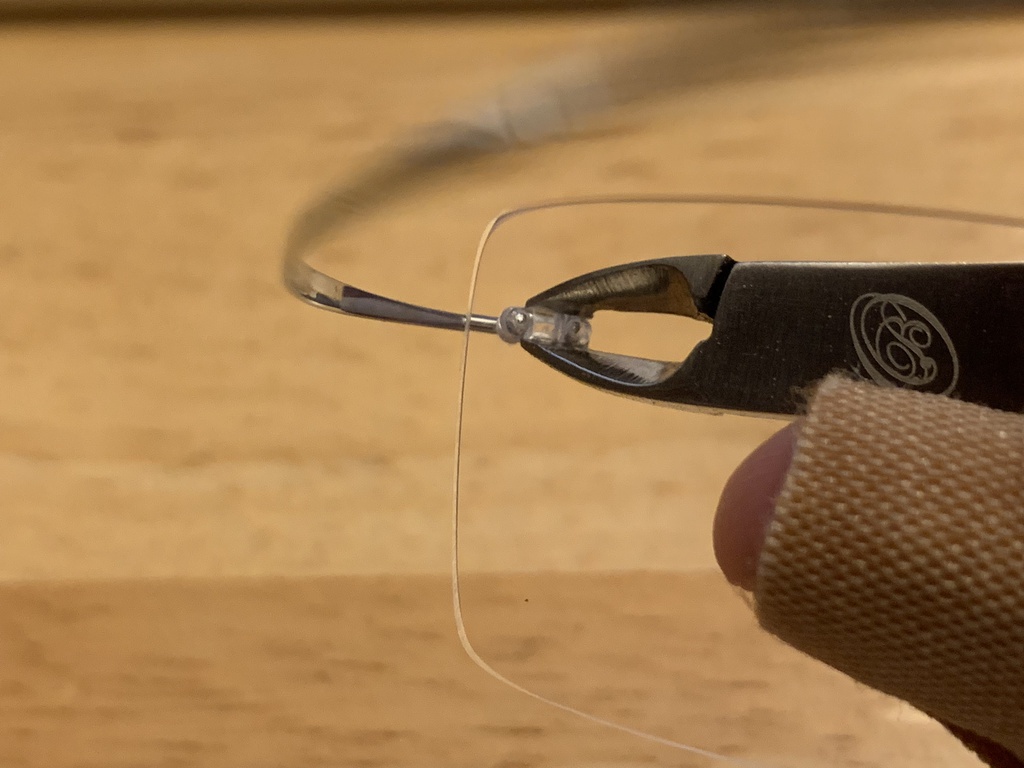
Here, you might worry about scratching the lens. But as long as you start with the clippers right on the grommet, any scratch you make will be under the grommet, which means that it will be hidden in the end. And as a general matter, vision right around the frame attachment points is going to be blocked by the frames themselves, so scratches around that area won’t be noticeable.
Once the grommet bases are all cut off, you can separate the frame parts from the lenses by gently rocking them back and forth until they come out. If necessary, you can use pliers to pull them off, though this may scratch the frame a bit.
Each part of the frame will have two prongs that originally fit into the holes in the lenses. The prongs will still probably have the plastic tubes from the grommets attached, like this:
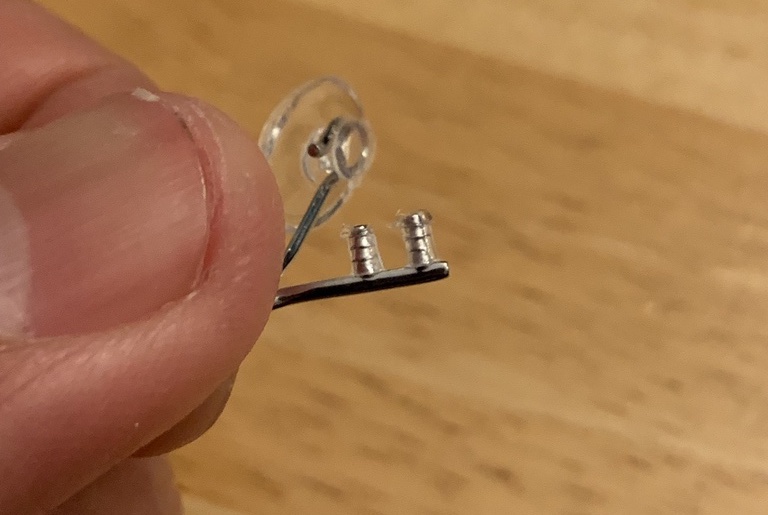
Those can be cut off easily with the clippers:
You should be left with the prongs clean:
All in all, you should have three frame pieces (two temples and a bridge), plus two lenses for assembly.
Assembly
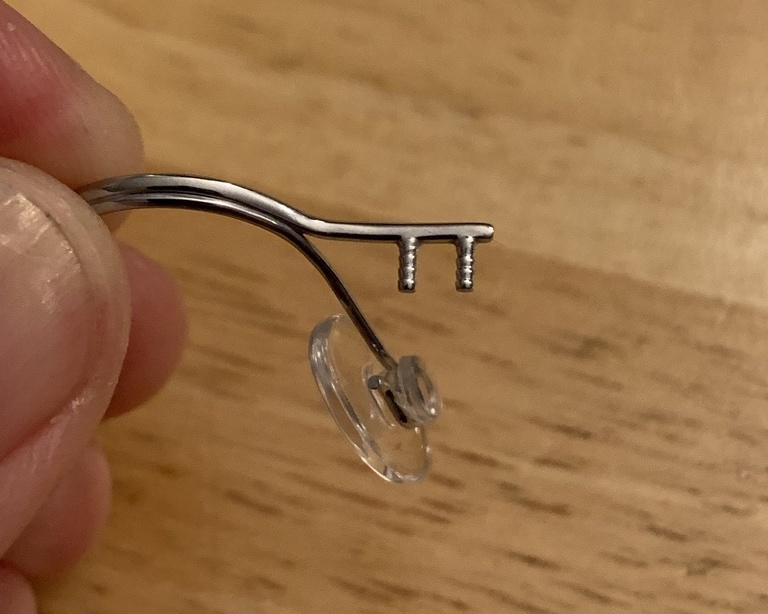
To assemble, first place a grommet into each pair of holes in the lenses, with the base of the grommet facing the inside of the lens. Then, for each grommet, press it with your fingers flush against the lens, likely causing the grommet base to bend to conform to the lens curvature.
The tubes will stick out from the front side of the lens. Use the cuticle clippers to cut off the excess of the tubes. Again, there is no need to worry about scratching the lens, because this area will be covered up by the frame metal.
Once all the tubes are trimmed, start putting the frame pieces in place. I like to start with the bridge first.
Place the frame piece into the correct holes of the lens, and press it into the corresponding grommet with fingers, just to keep it in place temporarily. If the frame piece will not stay in, you can use a toothpick or similar tool to slightly widen the holes of the grommet tubes.
Then, surround the grommet and frame piece with a folded-over piece of cleaning cloth like so:
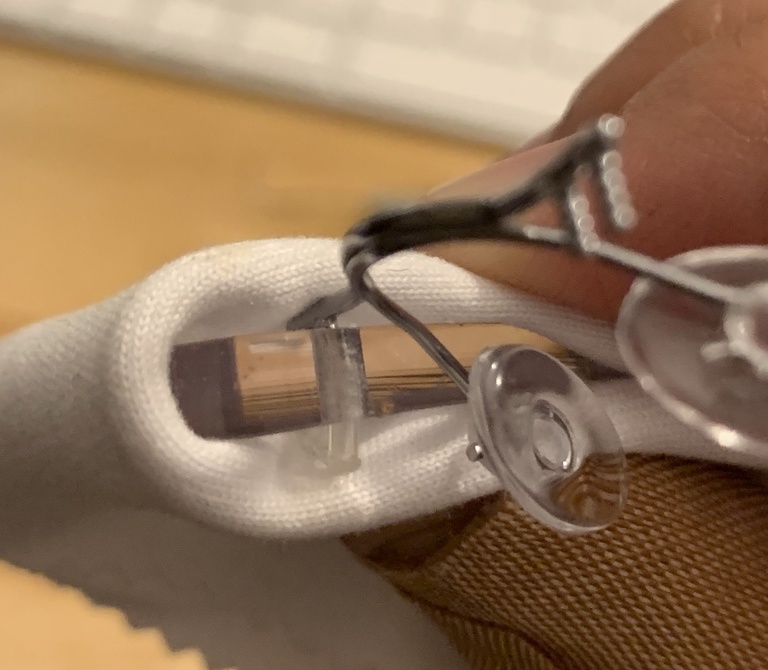
Ensure that the prongs of the frame are pointed in the right direction, so that the frame does not twist itself out of position when you try to push it in. Also, ensure that the grommet is mostly pushed into the holes (not like what is shown in this picture) because, being plastic, the grommet could potentially bend if it is outside the hole. It is helpful to position the folded cloth as shown in the picture so that you can see the positions of all the pieces.
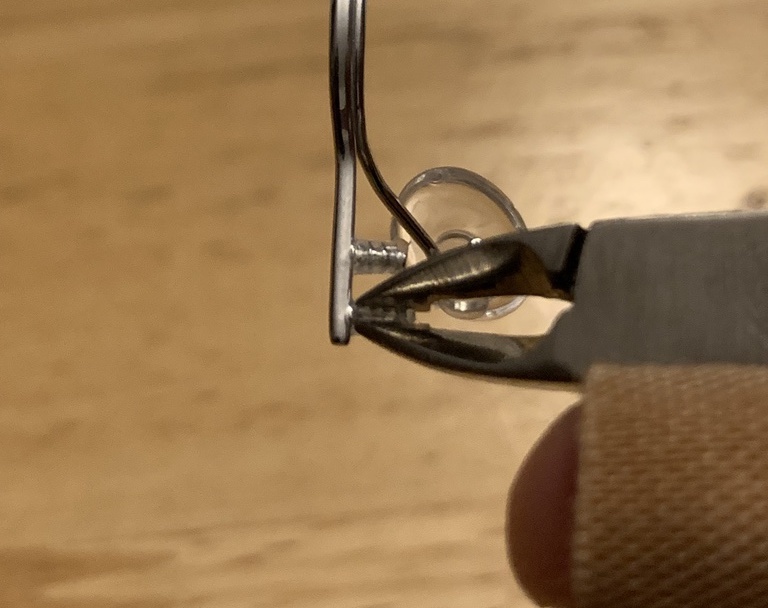
When everything is in place, use the pliers to press the frame into the grommet:

Compress slowly but firmly, and ensure that both tubes are pressed individually since the lens curvature means that they cannot be done at the same time. If the grommet has been pressed in sufficiently, then nothing should move and it should not be possible to fit a fingernail between the lens and the grommet or between the lens and the frame.
Do this for all four positions on the lenses, and you have a new pair of glasses!